
At Measured Survey Pro our team of surveyors is constantly evolving and looking for new ways on improving the speed of site visits but at the same time keeping the accuracy & quality of data at the highest standards.
In this article, we are going to share with you some of the easiest to implement tips & tricks that will make your site surveys & data processing faster and easier.
Laser Scanner Settings
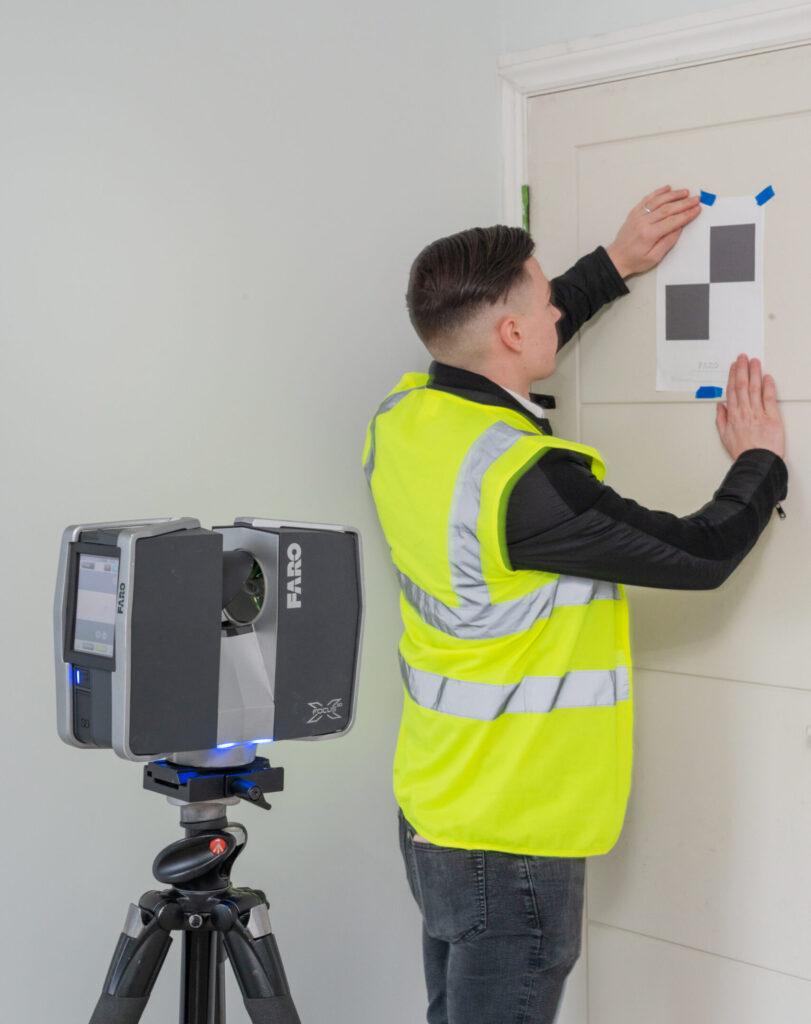
We use Faro Focus X130 terrestrial laser scanner for all our measured surveys. Nevertheless, the other Model S scanners like Faro S70, S150 & S350 have the same settings and speeds, as all models are capable of capturing data of up to 1 million points per second.
The key factor to remember is:
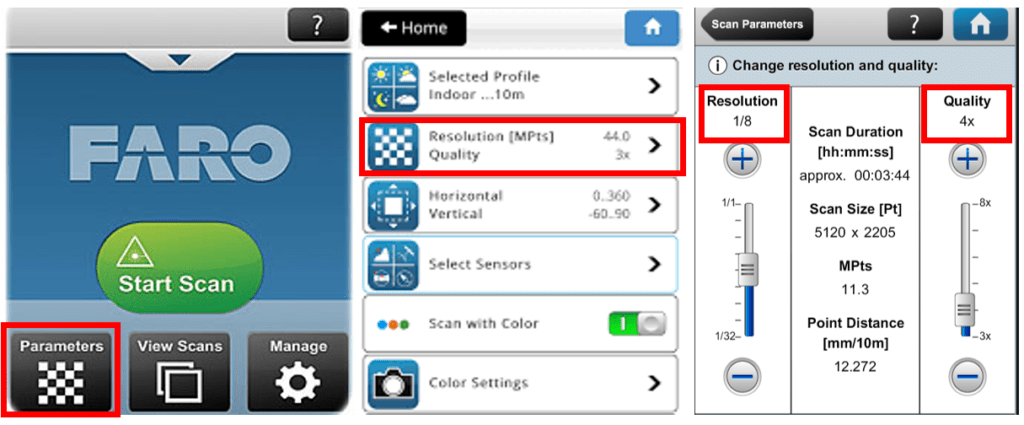
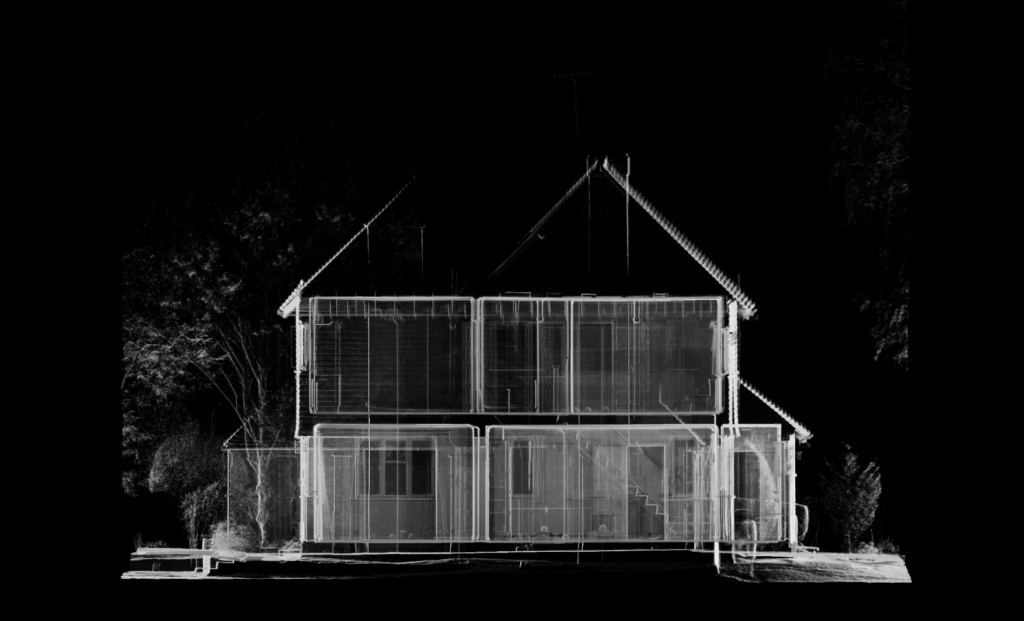
Resolution – The point distance between two points ( i.e 12.272mm @ 10m as per the image above )
Quality – The intensity of points averaging ( also known as oversampling ) per distance measurement.
You can find many forum discussions where various scanner users & experts debate on the best scanning settings for various conditions & scenarios. However, for our building measured survey needs we found the below settings working the best:
Indoors : Black & White – Quality x3 & Resolution 1/8 – 12.27mm @ 10m
Outdoors: Black & White- Quality x2 or x3 & Resolution 1/4 – 6.14mm @ 10m
The key to remember is the greater the scanning distance, the higher the resolution setting needs to be. There is also an option to scan in color. Choosing to scan in color or black & white all depends on your needs. Scanning in color may be necessary for example when surveying outdoors for a topographic site plan where details like types of plants and ground surfaces would be necessary to be shown, but not visible well on black & white scans. However, scanning in color will increase each scan time by around 4 minutes, making a huge difference in the time required for a site visit. One of the easiest ways to save time is by simply scanning in black & white settings but taking color photographs on your smartphone instead.
Targets & Registration
Faro Scene software used for processing & registration of point clouds into various formats benefits from allowing users to have various methods for registration of scans.
One of the most convenient ways of registering the scans is by using the Automatic Registration function available on Faro Scene. Nevertheless, you should never rely on software doing all the work for you alone, as over the years of 3D laser scanning we found that using targets will never harm, but at times may be crucial for the correct registration of the point cloud.
To use the targets most effectively, you first need to understand how the software sees them when registering the scans:
As described in our 3D Laser Scanning article, the scanner captures all data in x,y, and z coordinates, therefore the best practice in positioning the targets is in a triangle shape (as on the image below).
We found the most effective distances between sphere positions are 0.5m (indoors) & maximum 3m (outdoors).
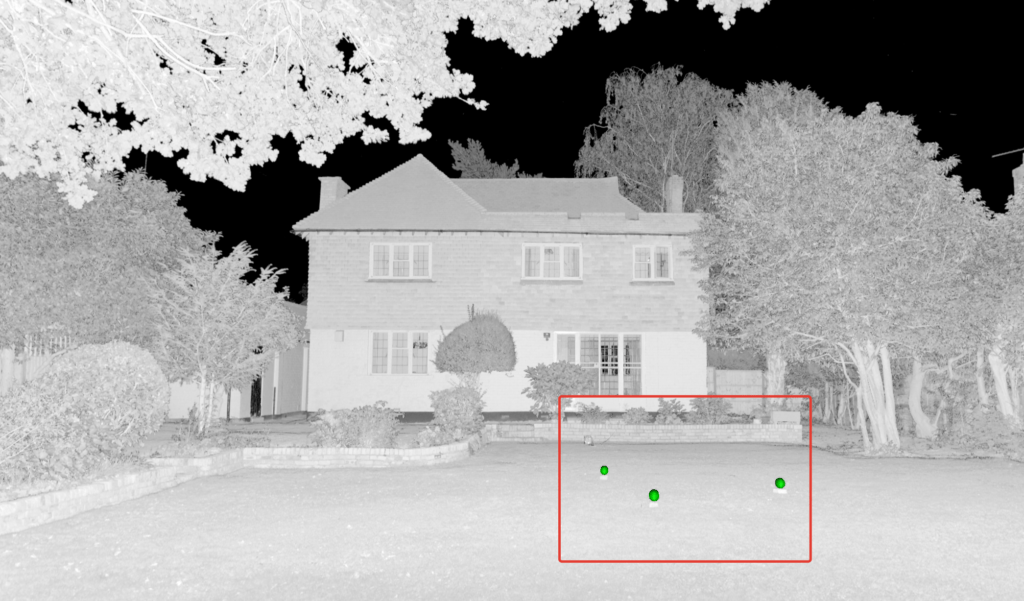
The software recognizes Faro compatible targets like spheres and uses them as a reference point. During the point cloud registration process, for the software to position and align two scans correctly, it needs to find common reference points between two scans. In other words, the software overlaps two scans and looks for the common points that overlap each other. This can be:
- Spheres
- Checker targets
- Planes (common walls, ceilings, floors, etc )
Although we aim to use the Automatic registration function available in Scene, even on the more advanced computers, the software cannot handle the registration of large projects on its own. For this reason, the project is broken down into parts, and using targets is the best way to register those parts together.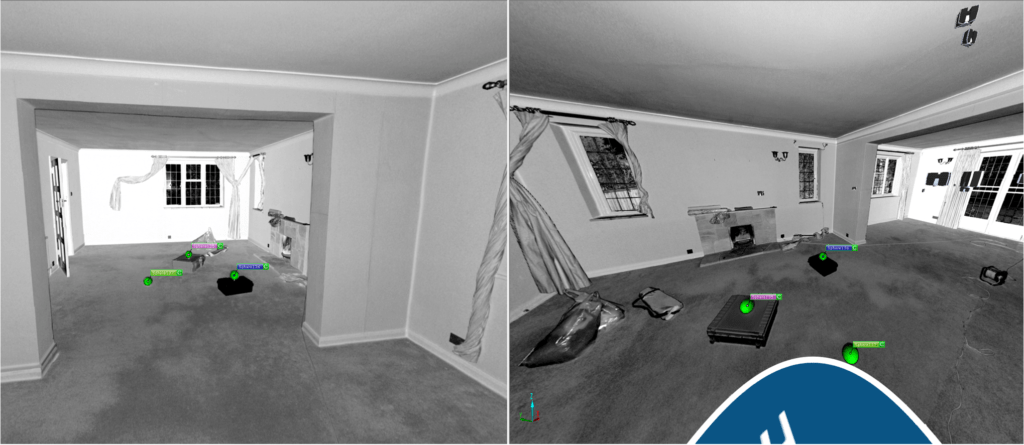
Scanner Positions
As mentioned above, for the point cloud to register correctly, there have to be common overlaps between two scans that are registered together. But simply having an overlap may not always be good enough! The golden rule is Higher Overlap = Higher Accuracy when registering the point cloud.
Many users without much experience in 3D laser scanning make a simple mistake. We call it the doorway mistake. You can have as many scans in each room or each floor of the building, but if you don’t have enough common overlapping points between those rooms or floors, your point cloud may not register correctly.
To eliminate the registration errors, during our measured building surveys we always put a scanner into each doorway, allowing the scanner to capture the maximum amount of common points between two rooms. We also take additional shots when scanning staircases, as those common points will be crucial when registering two floors together.
In regards to the scanner positions, we tend to keep the scanning distance < 3-5m inside the building & <5-10 when scanning outdoors.

4 comments
Nice article! Short, but has a few great points.
Currently it seems like WordPress is the top blogging platform out there right now.
(from what I’ve read) Is that what you are using on your blog?
I like this page, because so much useful stuff on here : D. Fran Halsey Barclay
One of our visitors recently recommended the following website. Emilie Ferris Fleischer